Week 1 - Targeted CV
Week 2 - Back Brief Presentation
Week 3 - Research/ Museum Plans
Week 4 - Modeling a jug
Week 5 - (Mid- Sem Break) Planning (Presentation)
Week 6 - (Mid- Sem Break) Planning (Presentation)
Week 7 - Presenting our Planning presentation / Change of plans
Week 8 - How do/ did we communicate? / Planning because of change
Week 9 - Individual milestone / Intellectual Property presentation (Oculus)
Week 10 - Conflict Presentation (Marker Project) / Progress
Week 11 - Progress / Remuneration Presentation (Aerial Ropeway)
Week 12 - Progress
Week 13 - Final Presentation / Refined submission
Week 14 - Final submission
Wednesday 10 June 2015
Week 14_Final
In the previous blog post, I mentioned that our goal for the 123d catch models was to lower it in size and optimise it in a way that it was small in size but still retained a level of detail. Aram has successfully optimised the 123d catch models using 3Ds Max. The result is quite good and obviously the detail of it is not as high definition as the original ones but the size of the file is significantly smaller and this is noticeable when view it in Revtizo.
We all had a bit of trouble getting all the 123d catch models together with our Sketch Up model in Revitzo, for some reason when I tried merging them together one model would always override the other. Aram has merged all the models in Sketch Up, where we are able to move and scale it. This has made our lives much easier but this also shows that these 123d catch models are compatible with Sketch Up. Below are images of the 123d catch models imported/ merged with our Sketch Up model.


Sketch Up Model:


Images above: Screenshots of the 123d catch models imported in Sketch Up
Sketch Up model in Revitzo
Below are images of the Sketch Up model with the 123d catch models merged into it imported into Revitzo using the plug in that is already in Sketch Up. The difference between how it looks in Sketch Up and Revitzo may not seem as visible through these images but the Revitzo viewer definitely gives a clearer and crisper model.


This part of the 123d catch model was the only part that did not look smooth/ connected and it has definitely lost some of its detail after being optimised. Other than that this still gives an idea of the limits that this model can be reduced and optimised.


Images above: Screenshots of our Sketch Up model imported into Revtizo
As you can see in the above images, after the 123d catch models have been optimised the level of detail is still there, therefore it is achievable to have a smaller sized file that still shows detail and clear texturing.
Download links to files:
Sketch up file without 123d catch files:
https://www.dropbox.com/s/cgtx4afiaiwfbdt/MERL_FINAL%20%28without%20123d%20catch%20models%29.skp?dl=0
Sketch up files with 123d catch files (combined):
https://www.dropbox.com/s/m809izosw59b6cy/MERL_FINAL%20%2B%20COMBINED.skp?dl=0
Revitzo file:
https://www.dropbox.com/s/so11m7ghqruozzv/MERL_FINAL_REVITZO.vimproj?dl=0
User manual:
- PDF: https://drive.google.com/file/d/0B6OtoldiZi3QaV96d1N0STEtRFE/edit
- Word: https://drive.google.com/open?id=0B6OtoldiZi3QTlZUZ0xOQlNUMlU&authuser=0
For more detail on how we collaborated as a group on this project view our group wiki here.
Friday 5 June 2015
Week 13/ 14
One of the things that we needed to fix up in our model was the beams located to the right of the museum. As seen in the picture below (taken by Russell) we were missing the top horizontal beam connecting the two diagonal beams. We have now fixed it up, as seen below.


Images above: Screenshots of the fixed up beams in Sketch Up and Revtizo
After our presentation on Wednesday, Russell gave us feedback saying that he wanted to see our 123d catch models (made by Dr. Ian) to be made smaller but still retaining the high detail that it currently has. Aram has worked on optimising each of the 123d catch files. We have been testing it on our individual laptops but unfortunately the textures are not showing up, so we are seeing how small we can get the file before the textures are not visible.


Aram has worked on it and he sent us some new files with the textures visible. For the past few hours I have tried to merge all the 123d catch files with the sketch up model but for some reason in Revitzo it keeps overriding my files and I am only able to get one file in with the Sketch Up file. I have decided to put it into 3ds Max and merge it there and then save it as a fbx and import it into Revtizo. Here are the results:


Everything looks very good in 3ds Max but unfortunately when imported in Revitzo the texturing does not work very well.


I'm not too sure what is happening, it is most likely a result of the file being imported from 3ds Max. I played around with Revitzo and 3ds Max and tried different options. I decided to just combine the courtyard and Sketch Up file in 3ds Max and then import it into Revitzo where I then combine the front facade of the museum.


Images above: Screenshots of the 123d catch images merged with the Sketch Up model
Overall, I am happy with the result as it is a much better result than what we were getting before. However, there are a few problems:
1. The butter churn (shown above) is having some strange texturing problems
2. The doors of the Sketch Up model have disappeared
Wednesday 3 June 2015
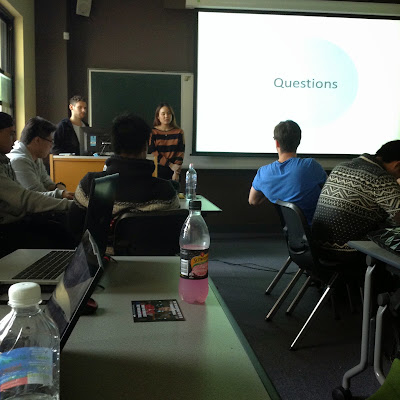
Week 13_ Final Presentation
Presented in class on the 03/06/15


Images above: Screenshots of the completed presentation created in Keynote
Feedback given:
- Sketch Up model- the structure on the right side of the interior of the museum was modeled incorrectly, there is an extra part to it that extends up and back down making a triangle structure/ support. --> This will be fixed by next week's submission.
- Try and get the 123d catch models made by Dr Ian Ewart smaller in size but still at a high quality.
- User manual - add more final images of what the manual is teaching.
- Have a more generic one on just Sketch Up (our manual is very specific to the Museum of English Rural Life)
Download our presentation here: https://www.dropbox.com/s/m4jsa00hk39xj6p/MERL_FinalPresentation_PPTX.pptx?dl=0
Process of putting our presentation together

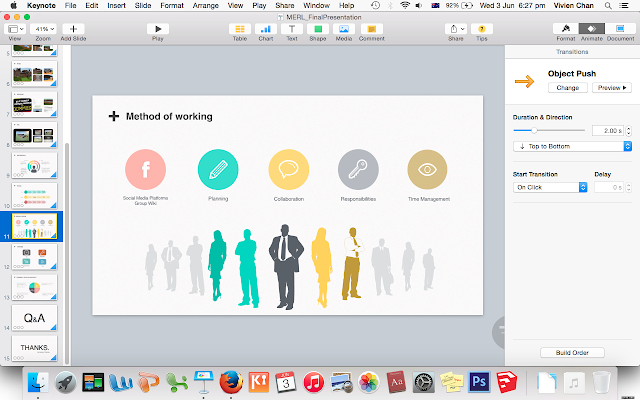
The method that we have been using for all the presentations this semester is listing out the points we need to talk about and choosing which one we want to work on/ present. For the final presentation I listed out the main things we needed to present:
- Original Brief
- Original aim
- Software
- Modified brief (Change)
- Software used now
- Our goal
- What did we achieve?
- What does the client want?
- End product
- Sketch Up Model --> Revitzo
- User Manual
- iPad
- User Experience
- Did we meet the clients expectations/ needs
- Method of working
- Process (e.g. Splitting up tasks)
- How did we collaborate?
- Challenges
- How did we overcome it?
Sunday 24 May 2015
Week 12
The progress on our Sketch Up model is moving along quite well and the set up we had at the beginning was one person would work on it and then upload it and pass it on. At first I thought this method was quite good but overtime there were so many different files being uploaded that some of us were editing the old file without realising our elements created by other members were not there. This caused quite a lot of confusion and frustration. For future reference, I think we should of split up the elements and created them in separate Sketch Up files and then copy and paste it into a central (final) file. I have done this before last year in a group project that also used Sketch Up and this method worked perfectly fine, unfortunately we are too far into this Sketch Up file to fix it up.
Also another confusion was that I discovered that the plan we were using at the beginning/ the plan we imported into Sketch Up as a base was the older version (still the new design of the museum but and earlier plan). There are only small differences like internal and external walls. I did stress to my group that we refer to the new plan which I had found (the latest one created in February 2015) but for some reason this caused a lot of confusion and miscommunication. To solve this I had to explain it multiple times the areas that had changed.
A few times I have had to fix up the layering in the model because some elements were placed in the wrong layer and was causing confusion.


The model as of 24/05/2015.
Wednesday 20 May 2015
Week 11- Remuneration Presentation (Aerial Ropeway)
20/05/15
Team: Aerial Ropeway
Team Members:
Pros:
Cons:
Notes:
How does remuneration relate to our project (Virtual Museum)?
Team: Aerial Ropeway

Team Members:
- Jordon Blanket (Presented)
- Hayley Chung (Presented)
- Erik Lukas Molinder
- Molly Wu
- George Logothetis
- Dominique Heraud
Pros:
- Great use of graphics- Made a timeline to show what they are talking about
- Confident presentation- extensive knowledge of some parts of the topic of remuneration
- Simple slides - to the point
- Used statistics in relation to us (Remuneration as a student) --> UNSW
- (Remuneration as a student) -- Gave tips that is of benefit and relevant to us
Cons:
- The topic was quite difficult and the way the flow of the presentation was presented was very confusing- got a bit lost in some areas.
- Only two people presented and it was clear which parts the members presented did not research on.
- Did not relate to their project (Aerial Ropeway)- only mentioned once/ mentioned that remuneration does not relate to their project
Notes:
- "Remuneration is a payment made to or for the benefit of a worker, that is not as simple as a wage or a salary as it includes such things as a remuneration return and a reconciliation statement"- Work Cover SA
- How much are you worth?
- What is your value proposition?
- Total reward system
- How do I add value to myself?
- Partake in study tours
- General Education
- Networking
- Internships
- Peer to Peer Competition
- Knowledge/ Experience= Value
- Knowing how to apply the skills
How does remuneration relate to our project (Virtual Museum)?
The topic remuneration did not particularly have any relation to any groups projects, as none of us are getting paid for our work/ final outcome. Instead we are getting "paid" or rewarded with grades and credibility. However, remuneration is an important topic for everyone as we are all looking for a full- time/ graduate position and we need to understand the process of how much we should be paid/ rewarded for the time, effort and skills we put in.
Through the discussion and feedback after this presentation, we established that it is acceptable to negotiate on a sensitive topic such as pay and that it is important for us to improve and increase on our knowledge and skills that will be of great value in whichever field we choose to work in.
Monday 18 May 2015
Week 11
As seen in the previous posts, as a team we finally started modelling the museum in Sketch Up. We decided to split the building up into categories such as external walls, internal walls, doors, window, slab etc. Obviously, it is quite difficult passing the model around (shared on Facebook) and problems will definitely arise. One problem that I quickly found after other team members completed their respective parts was that we did not group our items which caused objects to merge and create unnecessary lines which made the model look extremely messy.


Images above: Screenshots of items hidden by wire frame still visible and walls
missing/ merging into slab
I decided to create a new Sketch Up file and group everything in it's categories before moving them into the new file. This was very time consuming but in the end I do want to achieve a clean and organised model, so it was much better to do this process earlier than later when we have more elements in the model. The new file is grouped in it's categories which will avoid any merging and clashing with other items in the model. It is definitely much cleaner and easier to navigate around now.


Images above: Screenshots of new file (looks the same) but when items are hidden it doesn't
interfere with any of the other items.
As mentioned in my previous posts, we had a lot of difficulty finding out the height of the walls and overall structure in which we used the method of importing the drawings into ArchiCad and scaling it accordingly. I emailed Adam (project officer) at MERL who I have been in contact with since the start of the project. Once again, he has been extremely helpful and sent me the dwg. elevation and section files which we can use to get accurate measurements from.

Image above: Screenshot of email from Adam with the dwg. files and images he sent me on the 19/05/15
In the email Adam sent me 2 dwg. files- Elevation and Sections which contains elevations and sections from all sides of the building. This will definitely assist us in creating an accurate representation of the museum. Adam also sent some images of the existing and proposed museum, this gives us a visual idea of what the museum looks like, since none of us actually know what it looks like.

Image above: Screenshot of Elevation drawings in AutoCad

Subscribe to:
Posts (Atom)